My dear friend Liz asked me to write a little post explaining how to create a “Cozy Corner”. Before I begin to show you how I make my cozy corners, I want to explain that I use the same concept when creating the corners that I do when I create flower arrangements, hearth decor, as well as pretty much everything that I design. I start out with the basic items that I want to use to make the cozy corner design, flower arrangement, grouping, etc… I find that arranging things in different heights and using different textures within the design is important. Therefore, I always try to have several items of varying heights that are always sitting there and are “staples” (for description purposes) in all of my arrangements whether they are sitting in a corner or on the hearth or scattered on a shelf and sometimes used as a receptacle to hold flower arrangements. These items consist of an array of items such as wooden ladders, large crocks, baskets, trays, candle holders, etc… Also, when choosing the Seasonal items that I add to the staples, I try to pick taller, shorter, fatter, and thinner items to give the eye a variety of fun things to gaze upon. Also, I use a lot of mini light strings in my decor , I love to sit and look at subtle, twinkling lights that meander through the groupings.
Okay, so here we go. As you can see, these arrangements are both being displayed in the same corner:


You will notice that there are a couple of things in both photos that I used as my staples; the Longaberger basket under the throws and my grandmother’s sewing basket; you will notice that the Longaberger basket is taller than the sewing basket which is important to add height, depth and interest to the finished creation. Regarding the placement of the rest of the decor, I usually work from left to right, backward to forward, building on top of, beside, and in front of the baskets as I go. I use a varying array of items from wooden words, stuffed scarecrows/snowmen/etc…, themed pillows, and so on…
The next two pictures are groupings that are displayed in the same corner as the two pictures above. Again, I started out with the same staple items, the Longaberger basket and the sewing basket; I added the ladder to the decor this past summer and it will remain as one of my staples moving forward as we traverse through the Seasons:

To bring those staple items into the specific Season for which I am decorating, I add Seasonal items such as throws, pillows, signs, wooden words, pip berries garland, cloth napkins (tied around the ladder in the case of the picture on the left) and burlap bows. When creating these arrangements, I worked with the ladder first and when I was happy with that design, I moved all the way to the left and started placing items on the Longaberger basket beginning with folding and draping the throw over the basket, then I placed pillows and started moving to the right and placing items onto the sewing basket, then I moved forward and down to the floor placing the finishing touches.
This is another cozy corner where I create different looks for different Seasons; this is located beside my kitchen hutch. My “staples’ for this corner are two red wooden crates.


The crates are the same exact size but I have them turned different ways. I build the Seasonal decor starting on the top and working my way down and inside the crates. I use decorative items with varying heights and build from back to front on and in each crate treating each as its own section but keeping in mind that I want it to look like one cohesive unit when I’m finished.
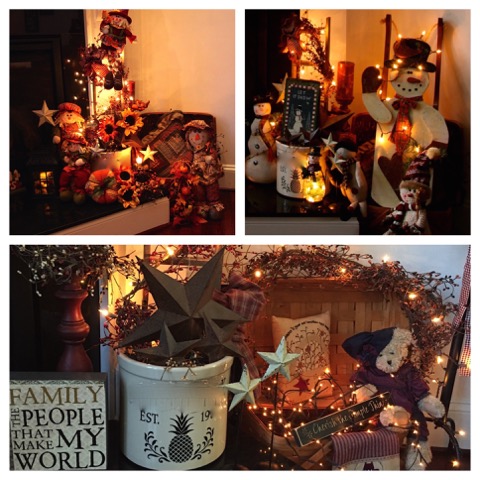
Let’s move to the fireplace hearth, these pictures highlight the left side of the hearth. The staple pieces that are always in place here are the wooden ladder wrapped with the lit pip berries garland, the tall candle holder to the left, and the Longaberger basket (on the floor).


I built these arrangements similarly by starting with the ladder, then moving forward and to either side using decorative items of varying heights and textures.
Here is a collage picture of what I do with the right side of the hearth. The staple items for that side are the large crock , the Longaberger baskets to the right, and the tall lantern candle holder. Those items stay in place throughout the year.
**Regarding the crock, I made it into a centerpiece by placing a ladder wrapped with a lit pip berries garland down into it and adding metal stars that lay on a bed of pip berries**

Here are pictures of two centerpieces made for different Seasons in much the same manner as the cozy corners described above. The staple items for this centerpiece are a burgundy wooden tray, 2 rod iron candle holders, a plaid cloth placemat and a rectangular lace doily.

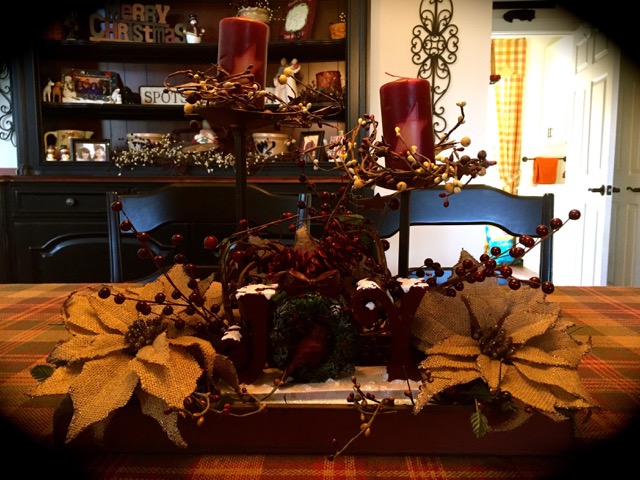
You’ll notice that I used the same pip berries garland in the tray and wove it around the candle stick holders in both centerpieces, but I changed out the other items to switch the centerpiece from one Season to another (in this case, I went from a more generic design to a one with a Christmassy feel).
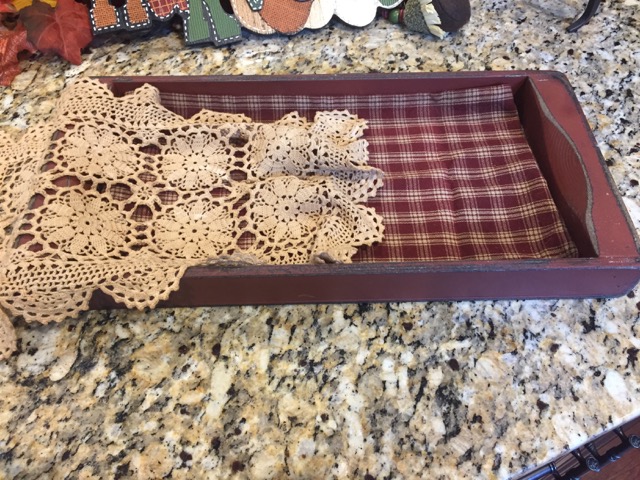
Now, I’m going to try to do a little tutorial describing in words and pictures how I put an arrangement together utilizing the same staples–the tray, rod iron candle stick holders, plaid placemat, and rectangular lace doily.
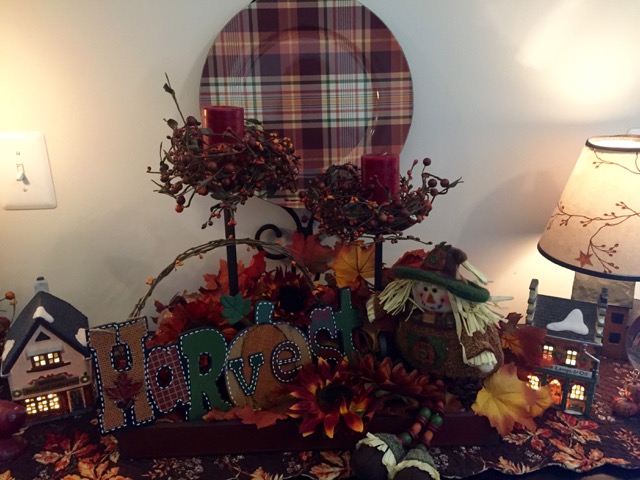
The first thing to do is to gather together all of the decorative items that one *might* use to create the arrangement. Then, place the placemat, doily, and candle stick holders where one wants them on the tray. (I did make the pip berries garland that surround the candles in these pictures).


After the staples are in place, start to build the arrangement by wrapping a leaf garland around and between the candle stick holders. After that place the “Harvest” sign and the Scarecrow. Then fill in some of the empty or baron looking spaces with sunflowers and a pumpkin. This literally took me 5 minutes to make, and honestly, it wouldn’t take you any longer. 🙂


Here is the finished centerpiece:

And this is where I chose to place it:

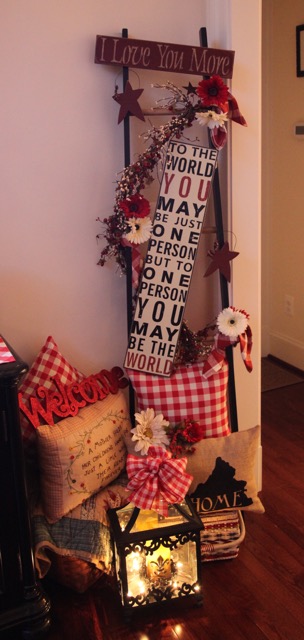
I will add one more example of an arrangement that I had out of my front porch last Fall. This grouping was created on a small wooden deacon’s bench, I followed same basic steps as I described for all of the arrangements/groupings above.

I started with a Fall themed throw blanket, and I built the rest of the grouping beginning with the Scarecrow on the left moving to the right and ending down on the porch. I placed the pip berries garland last weaving it in and around the other decorative pieces.
I hope upon hope that this helps to explain how I bring my cozy corners, groupings, and centerpieces to life for each passing Season. I know that y’all can do it and if you have any questions at all, I’m always available and will do my very best to give you complete answers that will hopefully help you make your own unique and special designs. 🙂
One more picture of the pups, they are so good and pose so nicely for their pictures. ❤

Until next time, y’all take good care! ❤
**In crafting there are no mistakes just unique creations**

Pingback: Guest Bedroom #1 – The Happy Room | Country Craft Corner
Arlynn, I met you at Hobby Lobby when you helped me with my burlap wreath! Your website is lovely!
LikeLike
Hey there Cookie!!! I’m so very glad that you found me here at my little Blog. You were so sweet that day in Hobby Lobby, I hope that your wreath turned out well and that you are happy with it!! 🙂 Thanks so much for leaving me a comment and letting me know that you’ve been here. Thank you for your very sweet words. 🙂
LikeLike
Pingback: Christmas 2015: Sled Centerpieces & “Merry and Bright” Grouping | Country Craft Corner
Pingback: Fireplace: Mantel & Hearth | Country Craft Corner
Pingback: Family Room: Cozy Corner & More | Country Craft Corner
Pingback: Seasonal Transitioning: Kitchen & Surrounding Area | Country Craft Corner
Pingback: Easter & Springtime Transitions – Country Craft Corner
Pingback: Rebuilding My Lil’ Red Wagon Decor – Country Craft Corner
Pingback: Pick A Theme & Carry It From Room To Room – Country Craft Corner